
Building an outdoor kitchen island sounds like a big job, but it’s one of the most rewarding upgrades you can make to your backyard. It turns your outdoor space into a place for cooking, gathering, and enjoying time with friends and family.
A lot of homeowners want an outdoor kitchen island but don’t know where to start. What tools do you need? How do you make it last? Is it something you can build yourself? The short answer is yes—with the right steps, materials, and a clear plan, it’s possible to build one that looks great and works just as well.
In this blog, we’ll show you exactly how to build an outdoor kitchen island from the ground up. Each step is explained simply, so you’ll know what to do, what to use, and how to get it done—without guessing. Let’s get started.
Why an Outdoor Kitchen Island Is a Smart Upgrade
An outdoor kitchen island adds more than just style to your yard. It gives you a dedicated space for cooking, prepping, and spending time outdoors. Instead of running back and forth from your indoor kitchen, you can do everything outside—grill, serve, and enjoy.
Next, it helps you use your space better. Many backyards sit empty most of the time. By adding an outdoor kitchen island, you turn that space into something useful. It becomes a place where family and friends gather. You can make meals, host events, or just relax with a quick snack.
Finally, it adds value to your home. Many buyers today look for outdoor features. A well-built outdoor kitchen island can catch attention and boost resale value. Even if you’re not selling anytime soon, it still makes your home feel more complete and enjoyable.
Step-by-Step Guide to Building an Outdoor Kitchen Island
Now that you know why an outdoor kitchen island is a smart upgrade, let’s break down the process. Each step matters, and following them in the right order makes the whole project easier. This guide will walk you through the build from start to finish in a simple and clear way.
Step 1: Choose the Right Location
Before you start building, you need to pick the best spot. A good location can make cooking easier and help you enjoy the space more. Think about where you spend time in your yard and how far the area is from your indoor kitchen.
Here are a few things to keep in mind when choosing the location:
- Look for flat, level ground
- Choose a spot with enough room to move around
- Stay close to your indoor kitchen or grill area
- Keep it away from trees or anything that might block airflow
- Make sure there’s space for future upgrades like a pergola or lighting
Picking the right spot at the start helps avoid problems later. It also makes sure your outdoor kitchen island feels like a natural part of your yard, not just something added in a hurry.
Step 2: Clear the Area
Once you’ve chosen the right spot, the next step is to clear it. This helps you start with a clean space and gives you room to build your outdoor kitchen island safely and neatly.
Here’s how to clear the area:
- Remove any grass, plants, or old pavers
- Clear away debris, stones, and tools lying around
- Mark the layout of the island using string or spray paint
- Make sure you have easy access to the space from all sides
- Check the ground for dips or bumps that may need leveling
Taking time to prep the area keeps the project smooth. It also gives you a better idea of how much space you’re working with.
Step 3: Create a Simple Design
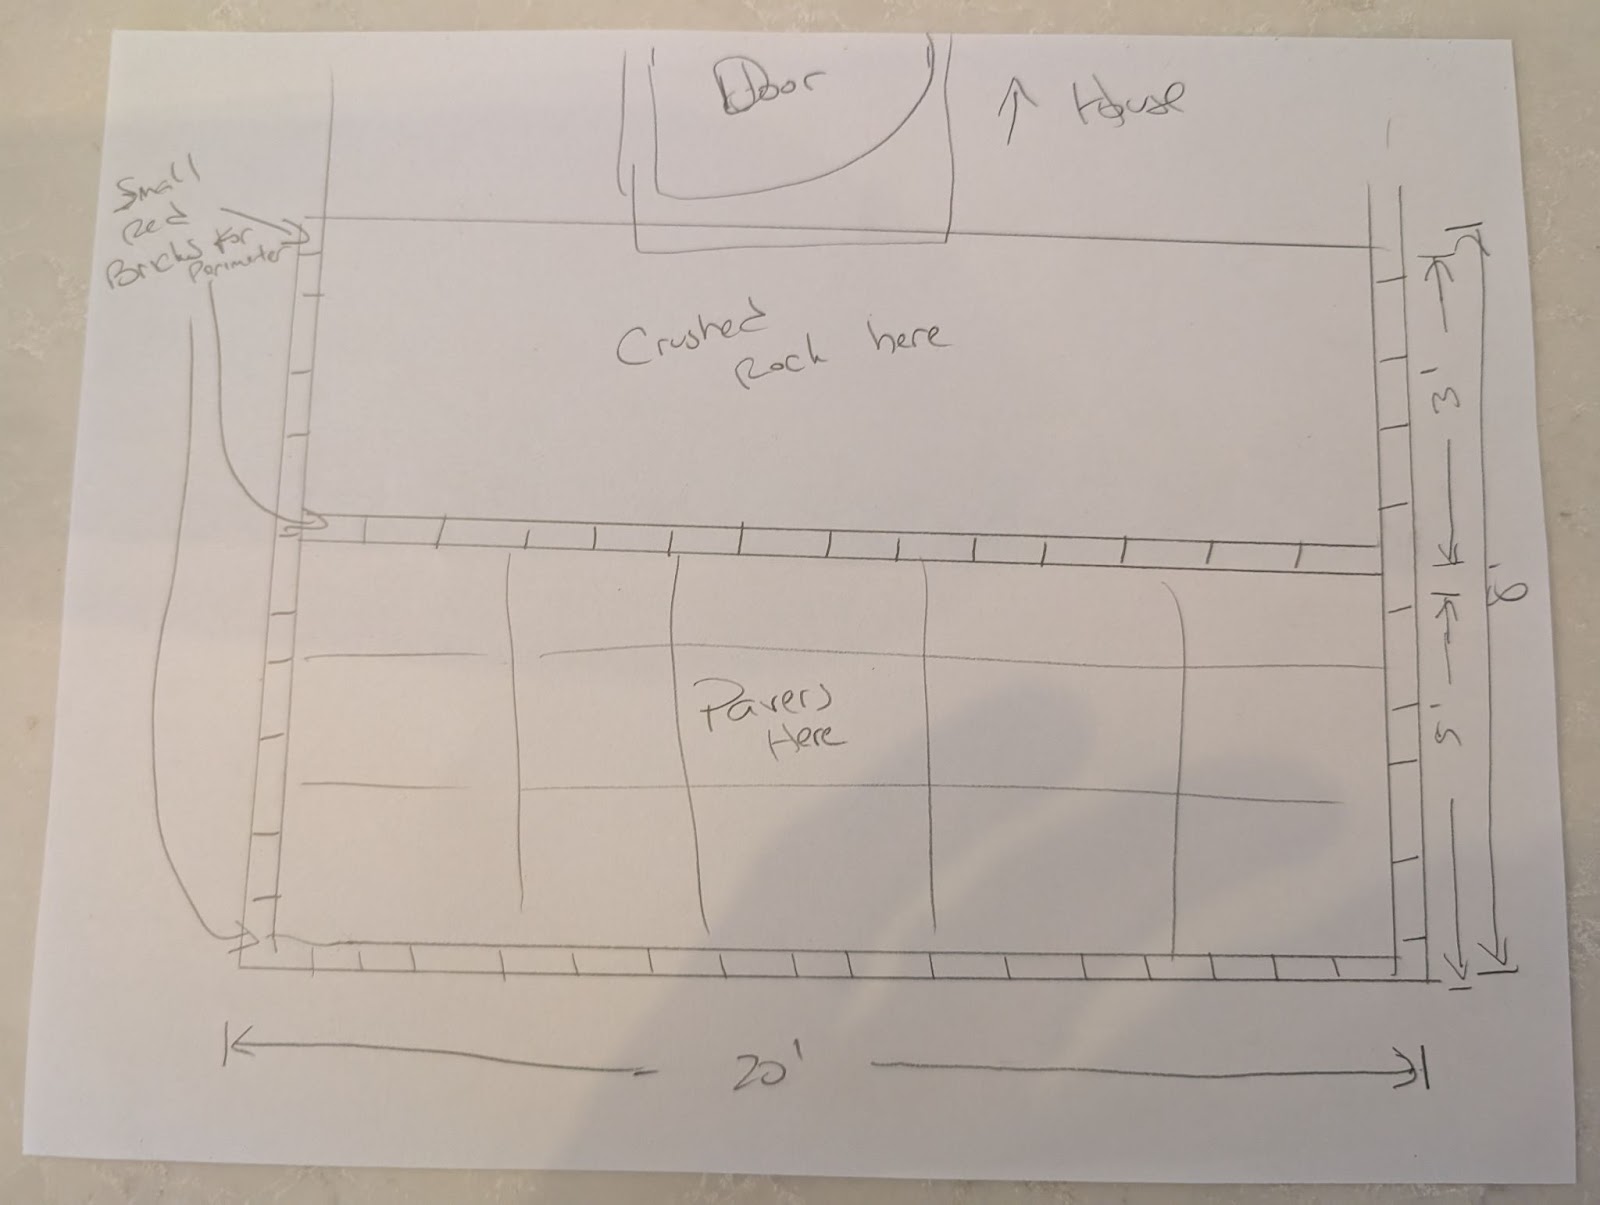
Now that the space is clear, it’s time to plan your outdoor kitchen island. A good design helps you stay on budget, choose the right materials, and avoid mistakes during the build. You don’t need fancy software—a simple sketch works just fine.
Here’s what to include in your design plan:
- Decide on the shape and size of the island
- Mark spots for the grill, counter, and any storage
- Plan the height and width for easy use
- Leave space for movement around the island
- Make sure it fits your cooking and hosting needs
A clear design keeps the project focused. It also helps you shop for materials and communicate better if you’re working with a contractor or team.
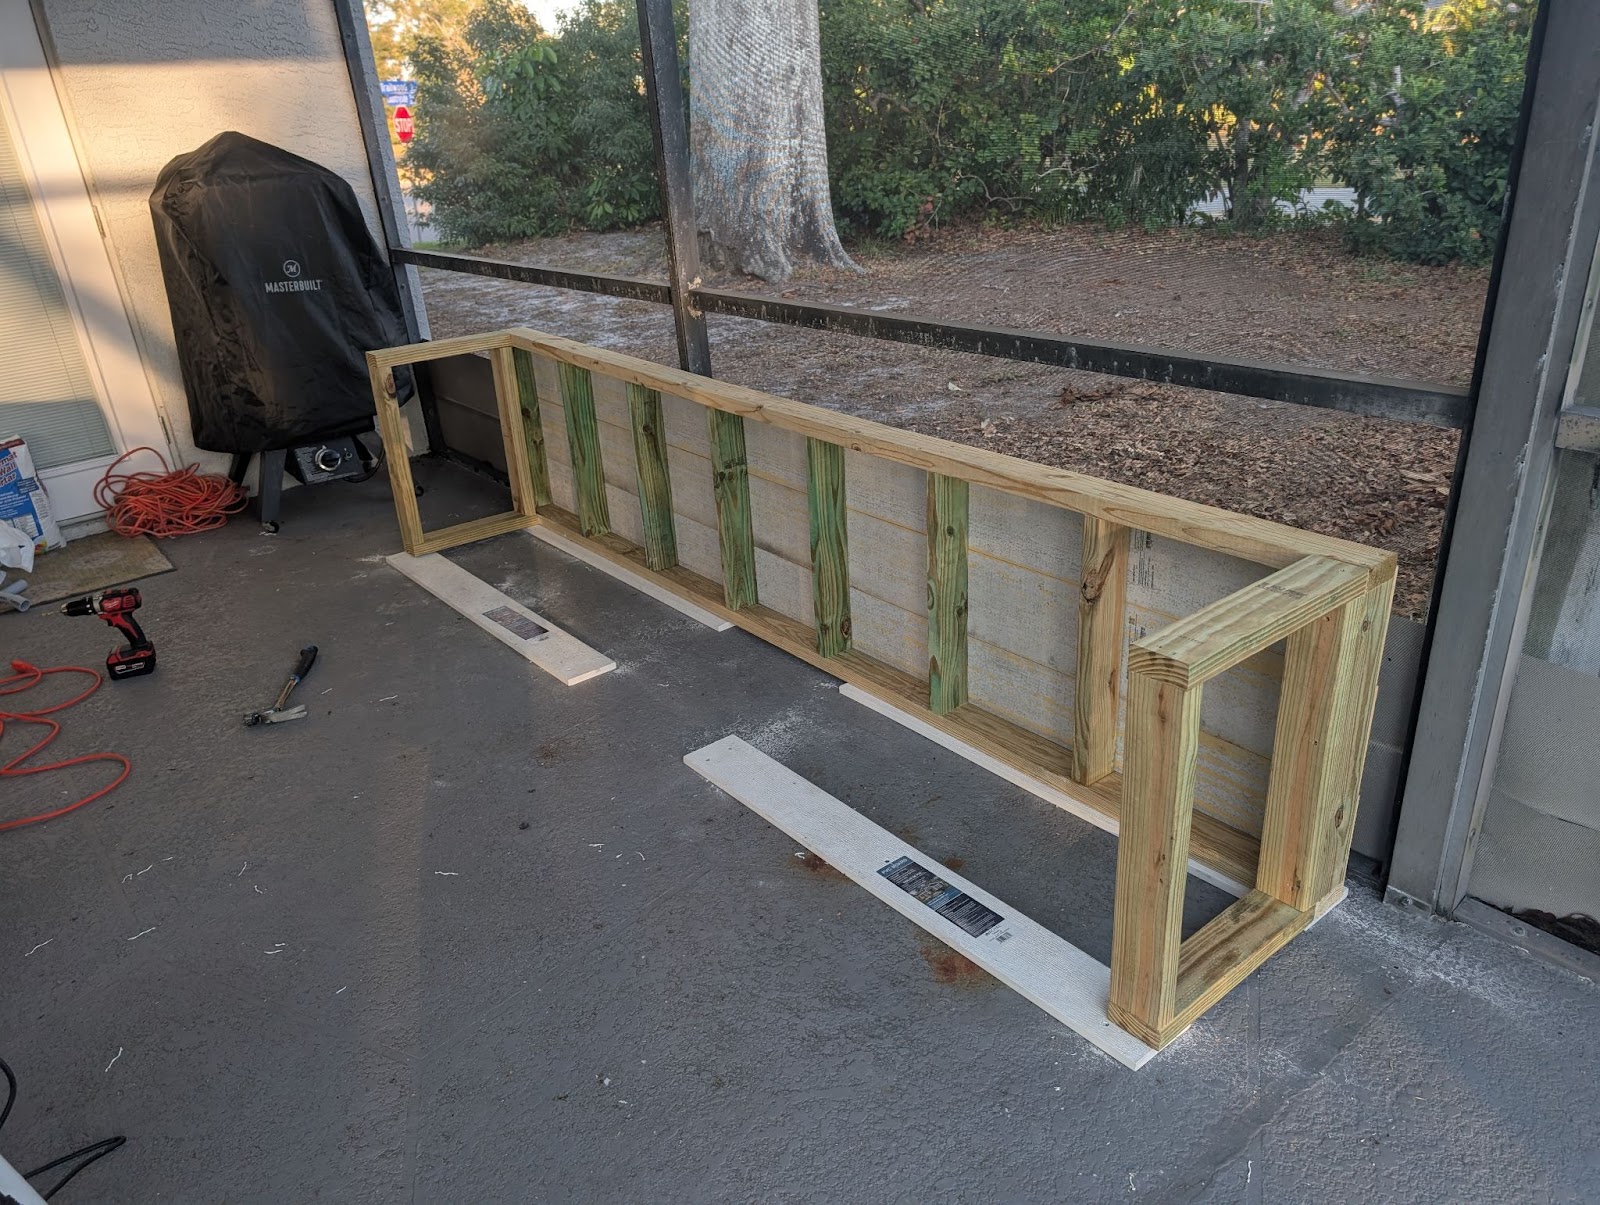
Step 4: Build a Wooden Frame
The wooden frame is the base of your outdoor kitchen island. It supports everything that comes next, so it needs to be strong and level. This step sets the shape, size, and stability of your island.
Here’s how to build the frame:
- Use pressure-treated lumber to handle outdoor weather
- Cut the wood to match your design measurements
- Build a base frame on the ground, then add upright supports
- Use screws instead of nails for better hold and durability
- Check with a level often to keep the frame straight
A solid frame gives you a good foundation for every other layer—cement board, tile, and all the finishing work that follows.
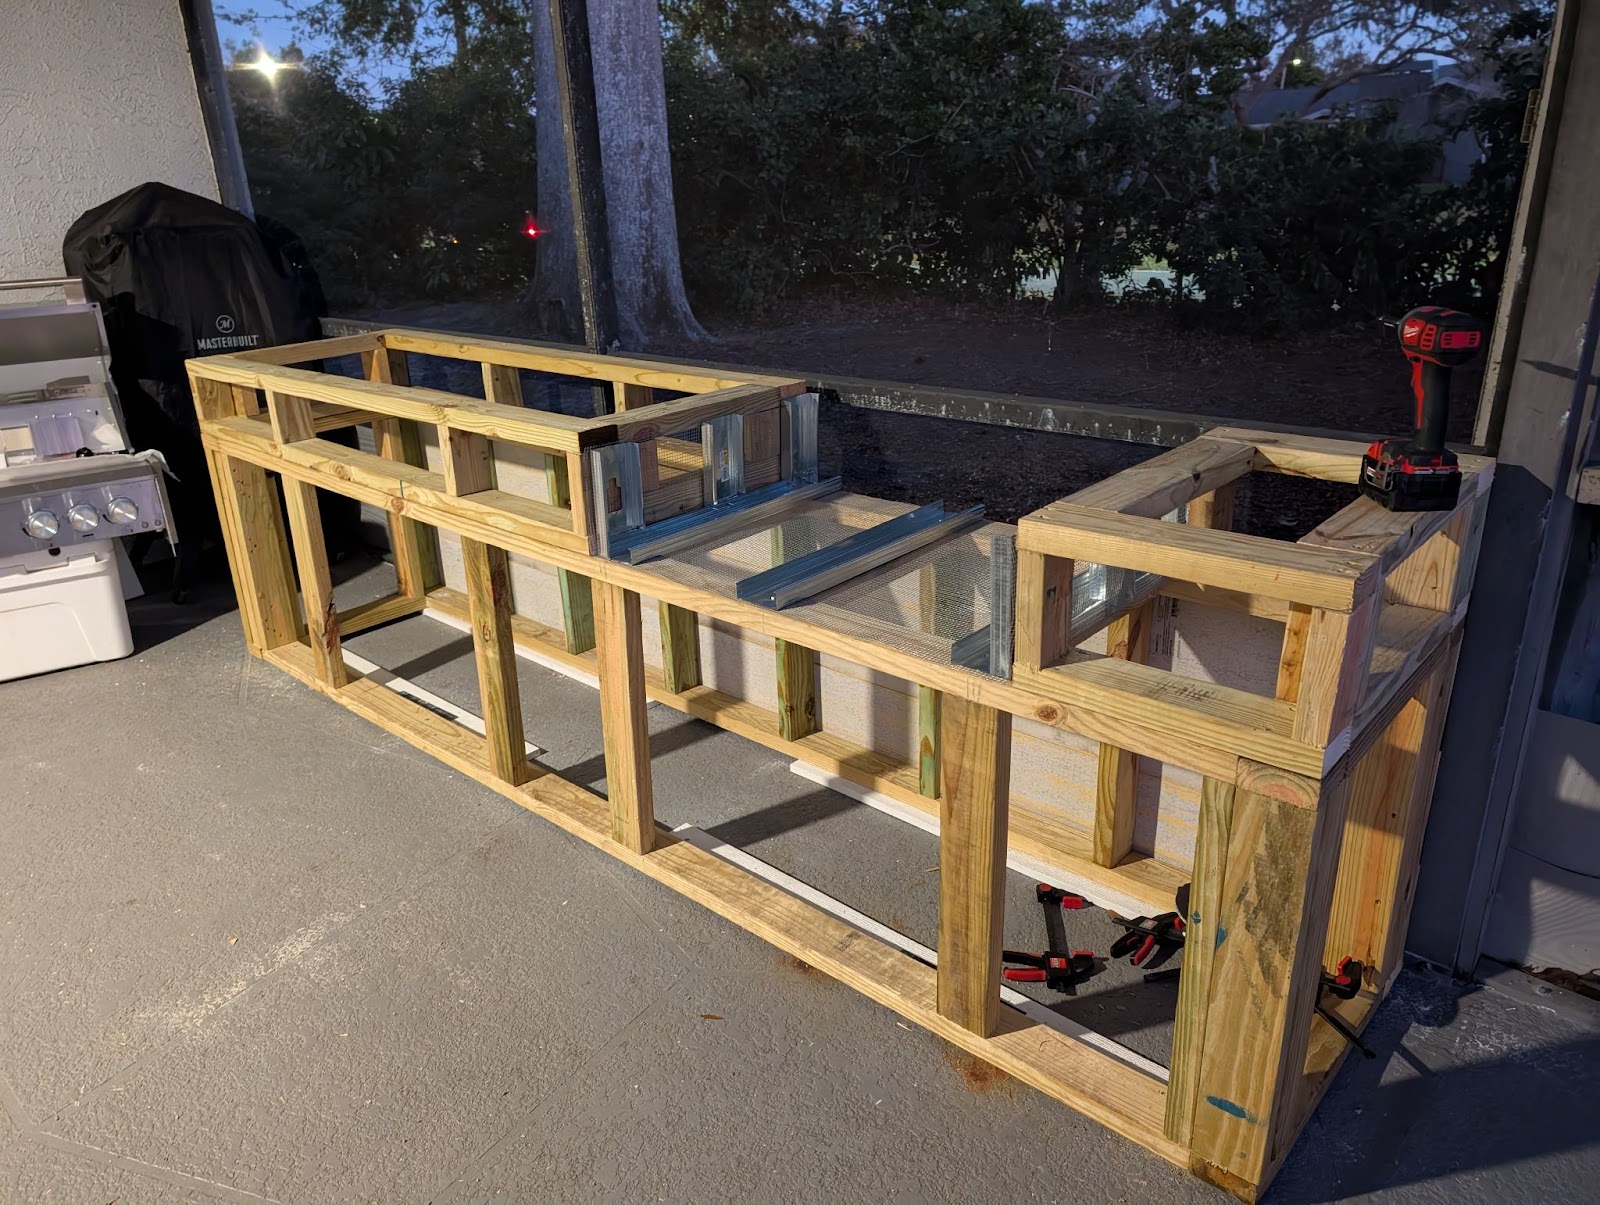
Step 5: Add the Grill or Stove Setup
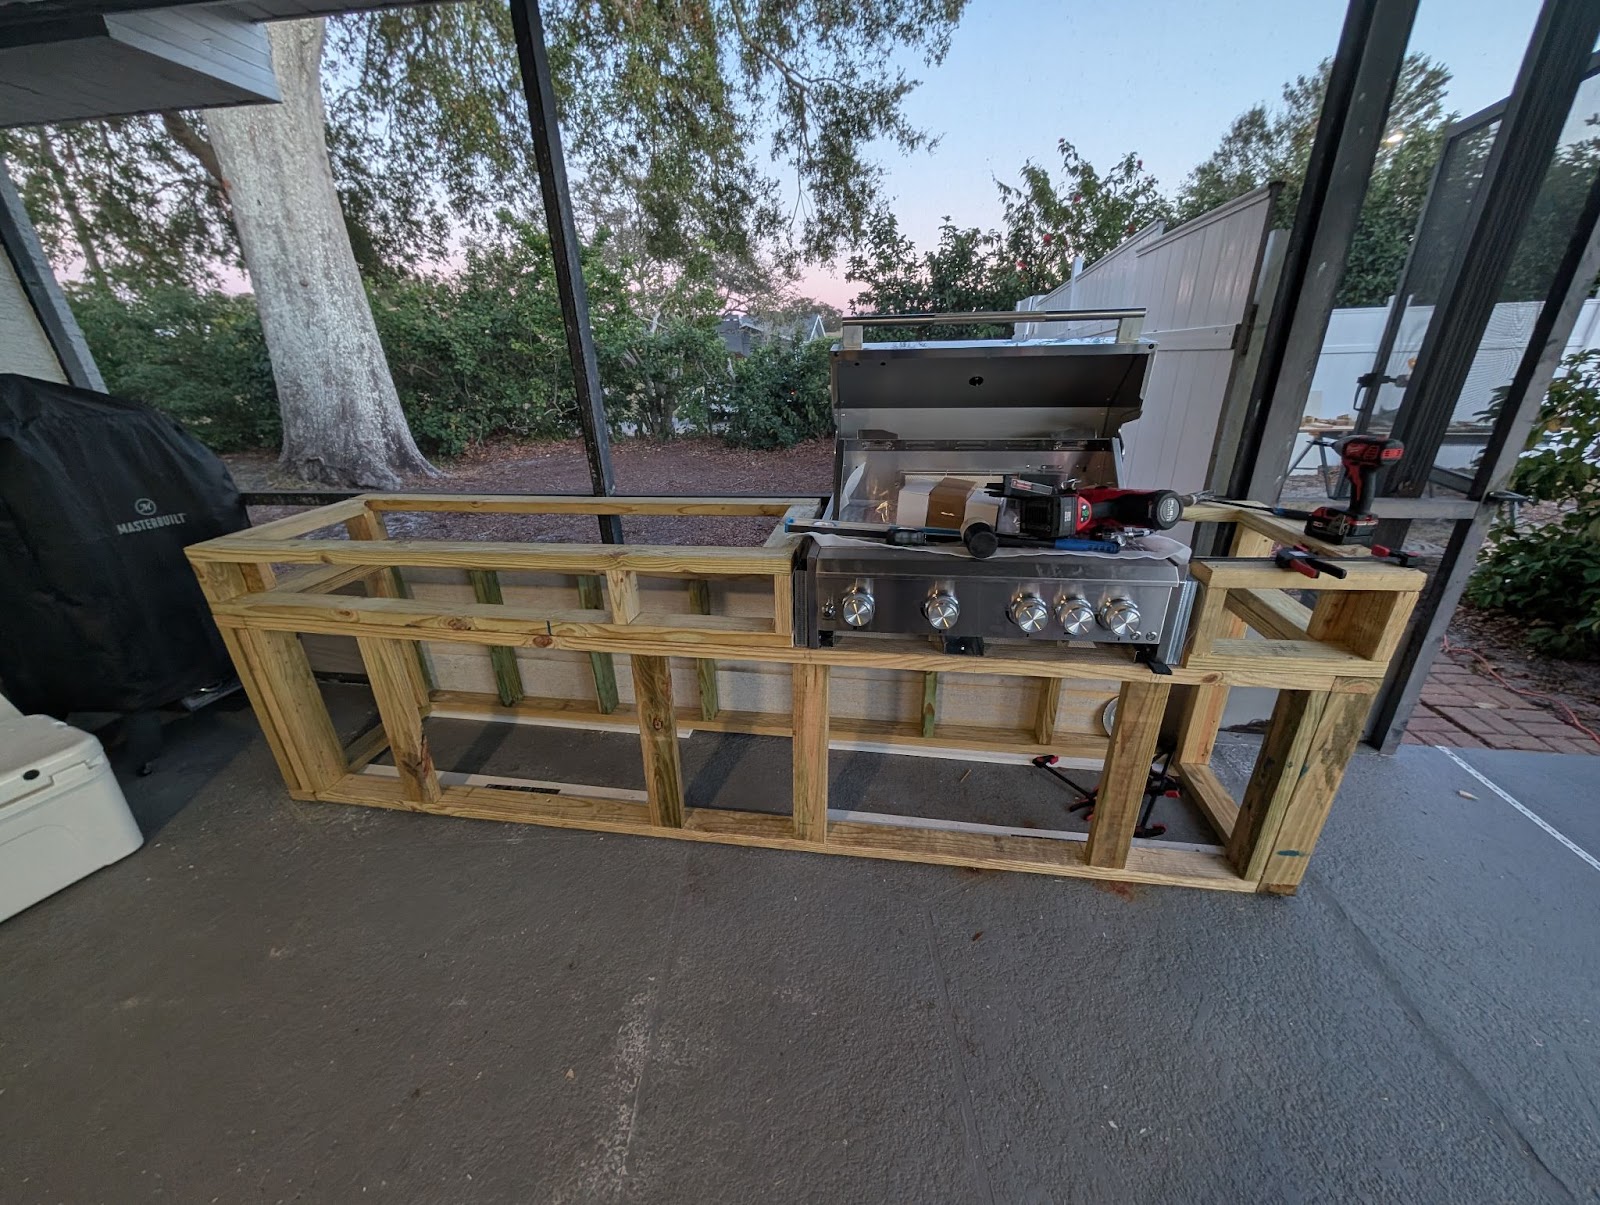
Now that your frame is built, it’s time to add the main feature—the grill or stove. This is where you’ll do most of your cooking, so placement and safety matter. Plan this part carefully before moving forward.
Here’s what to keep in mind:
- Choose between a built-in grill or a freestanding one
- Leave enough space around the grill for safe airflow
- Plan for ventilation and heat protection
- Make room for gas or electrical connections
- Use metal brackets or framing if needed for extra support
Setting the grill properly ensures it stays secure and safe to use. It also helps you enjoy cooking without worrying about damage or heat problems later on.
Step 6: Attach Cement Board to the Frame

With the grill in place, it’s time to cover the frame using cement board. This layer creates a fire-safe, sturdy surface that holds your final finishes like tile or stone. It also helps protect the frame from weather and heat.
Here’s how to attach the cement board:
- Measure and cut panels to fit all sides of the frame
- Use outdoor-rated screws to fasten each panel securely
- Keep screw heads flush with the board surface
- Leave small gaps between panels for movement and expansion
- Tape over seams with mesh tape if needed for tile prep
Once the cement board is attached, your island will look much more like a finished structure. It gives you a clean, solid base to move forward with the next steps.
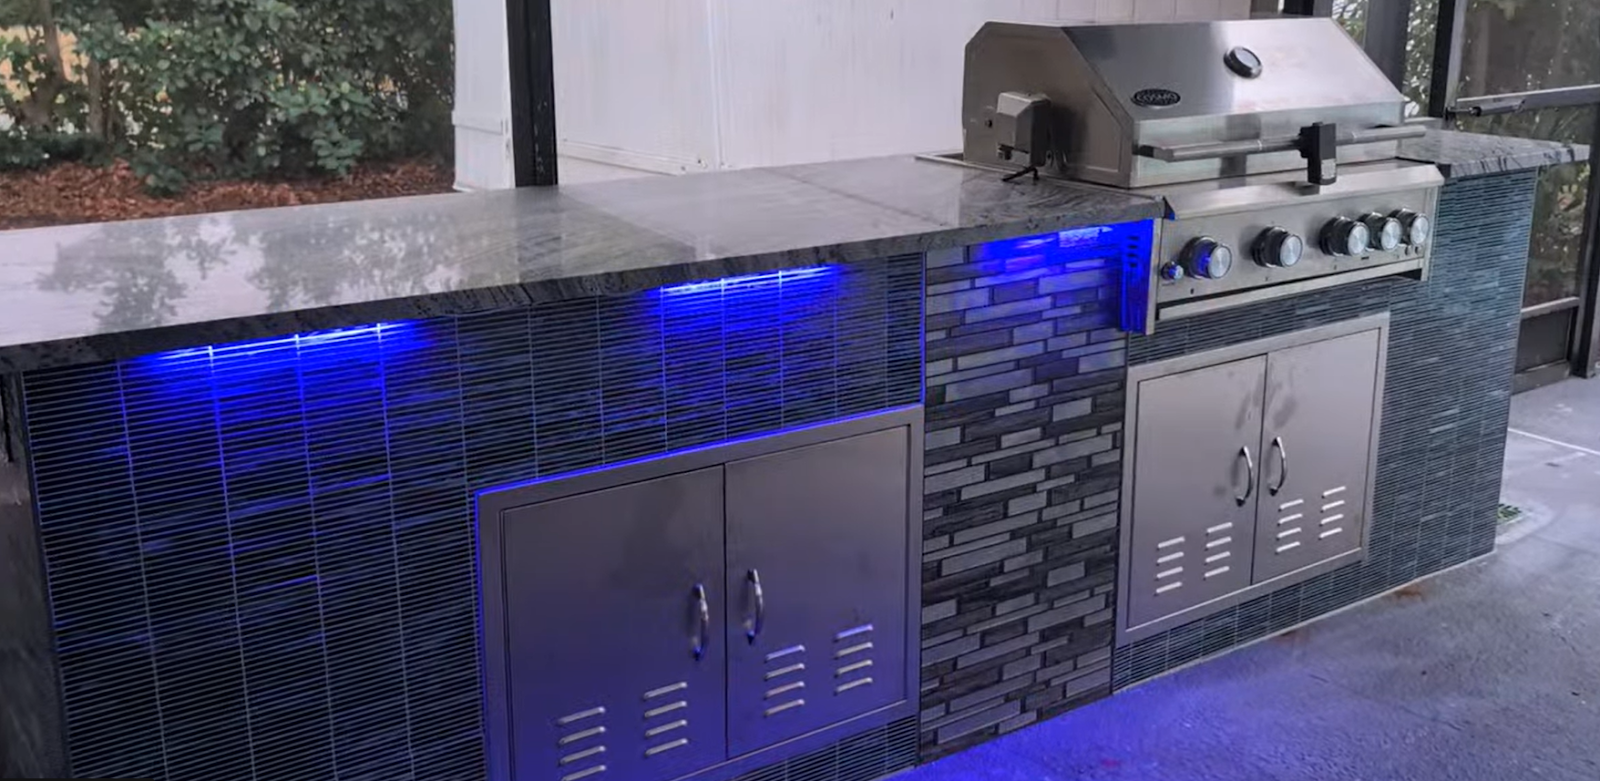
Step 7: Finish with Tile or Stone

Now comes the part that gives your outdoor kitchen island its final look. Adding tile or stone not only makes the island stronger, but also improves how it looks. Choose materials that match your outdoor space and can handle heat, water, and weather.
Here’s how to do it right:
- Use outdoor-rated tile, stone, or stacked veneer
- Apply a thin layer of adhesive or mortar to the cement board
- Place tiles or stone with even gaps between each piece
- Use spacers for clean lines if needed
- Add edge trim or corner caps for a smooth finish
This step is where your island starts to feel complete. A clean tile job makes your work stand out and gives the whole space a polished look.
Step 8: Build in Storage Space
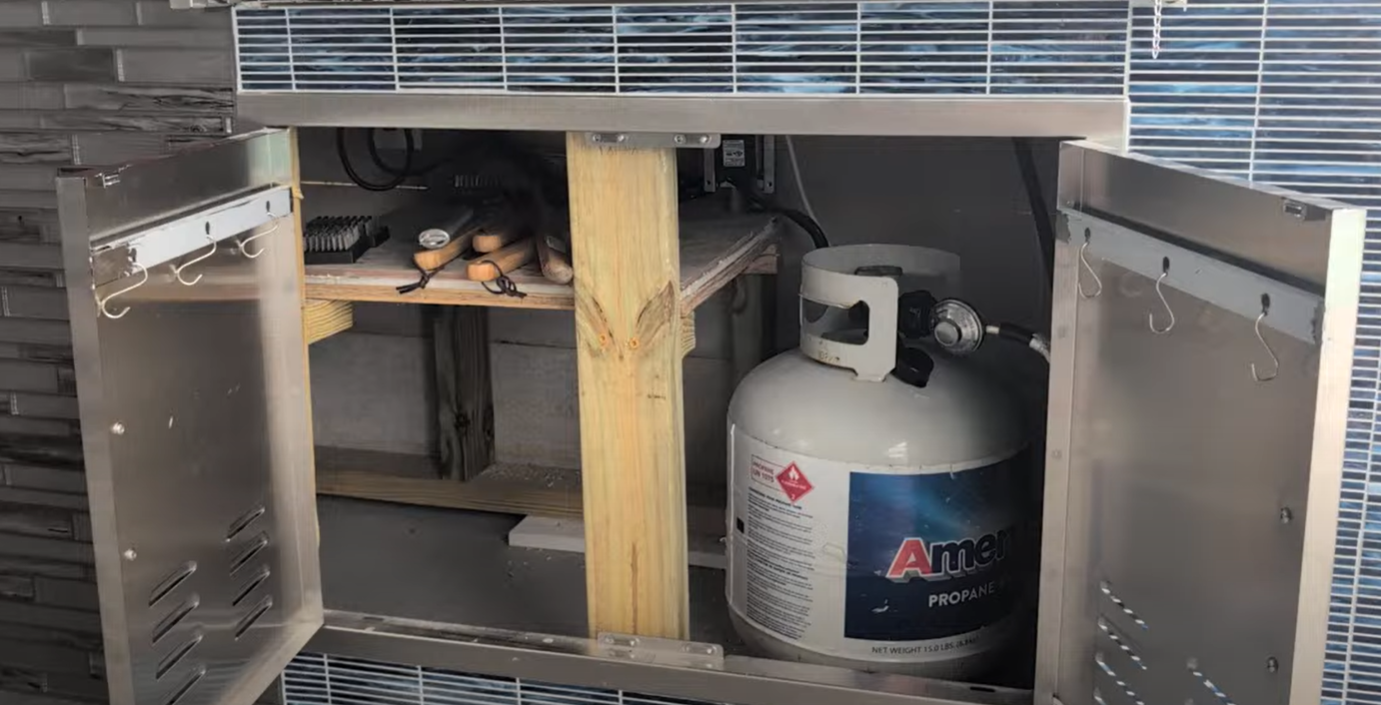
Outdoor cooking needs tools, utensils, and extra supplies, so adding storage makes your kitchen island more useful. Even a small shelf or cabinet can help keep things organized and close at hand.
Here’s how to include smart storage:
- Build open shelves under the countertop for easy access
- Add cabinet boxes with waterproof doors if you want a cleaner look
- Use stainless steel or treated wood to resist the weather
- Leave space for storing propane tanks, grilling tools, or dry goods
- Keep storage low and dry to protect from rain and heat
A little storage goes a long way. It keeps your space tidy and helps you cook without running in and out of the house.
Step 9: Add Lighting and Power
Good lighting makes your outdoor kitchen island safer and easier to use, especially at night. Power outlets are also helpful for plugging in small appliances or tools. This step adds comfort and function to your space.
Here’s what to include:
- Install one or two outlets for blenders, lights, or small devices
- Add task lighting over the cooking and prep areas
- Use weatherproof covers for all outdoor plugs
- Place lights under counters or inside cabinets for soft, useful light
- Keep wiring protected and out of the way
Lighting and power turn your island into a full working space. You’ll be able to cook, clean, and host—day or night—without missing a step.
Step 10: Install a Roof or Shade Cover
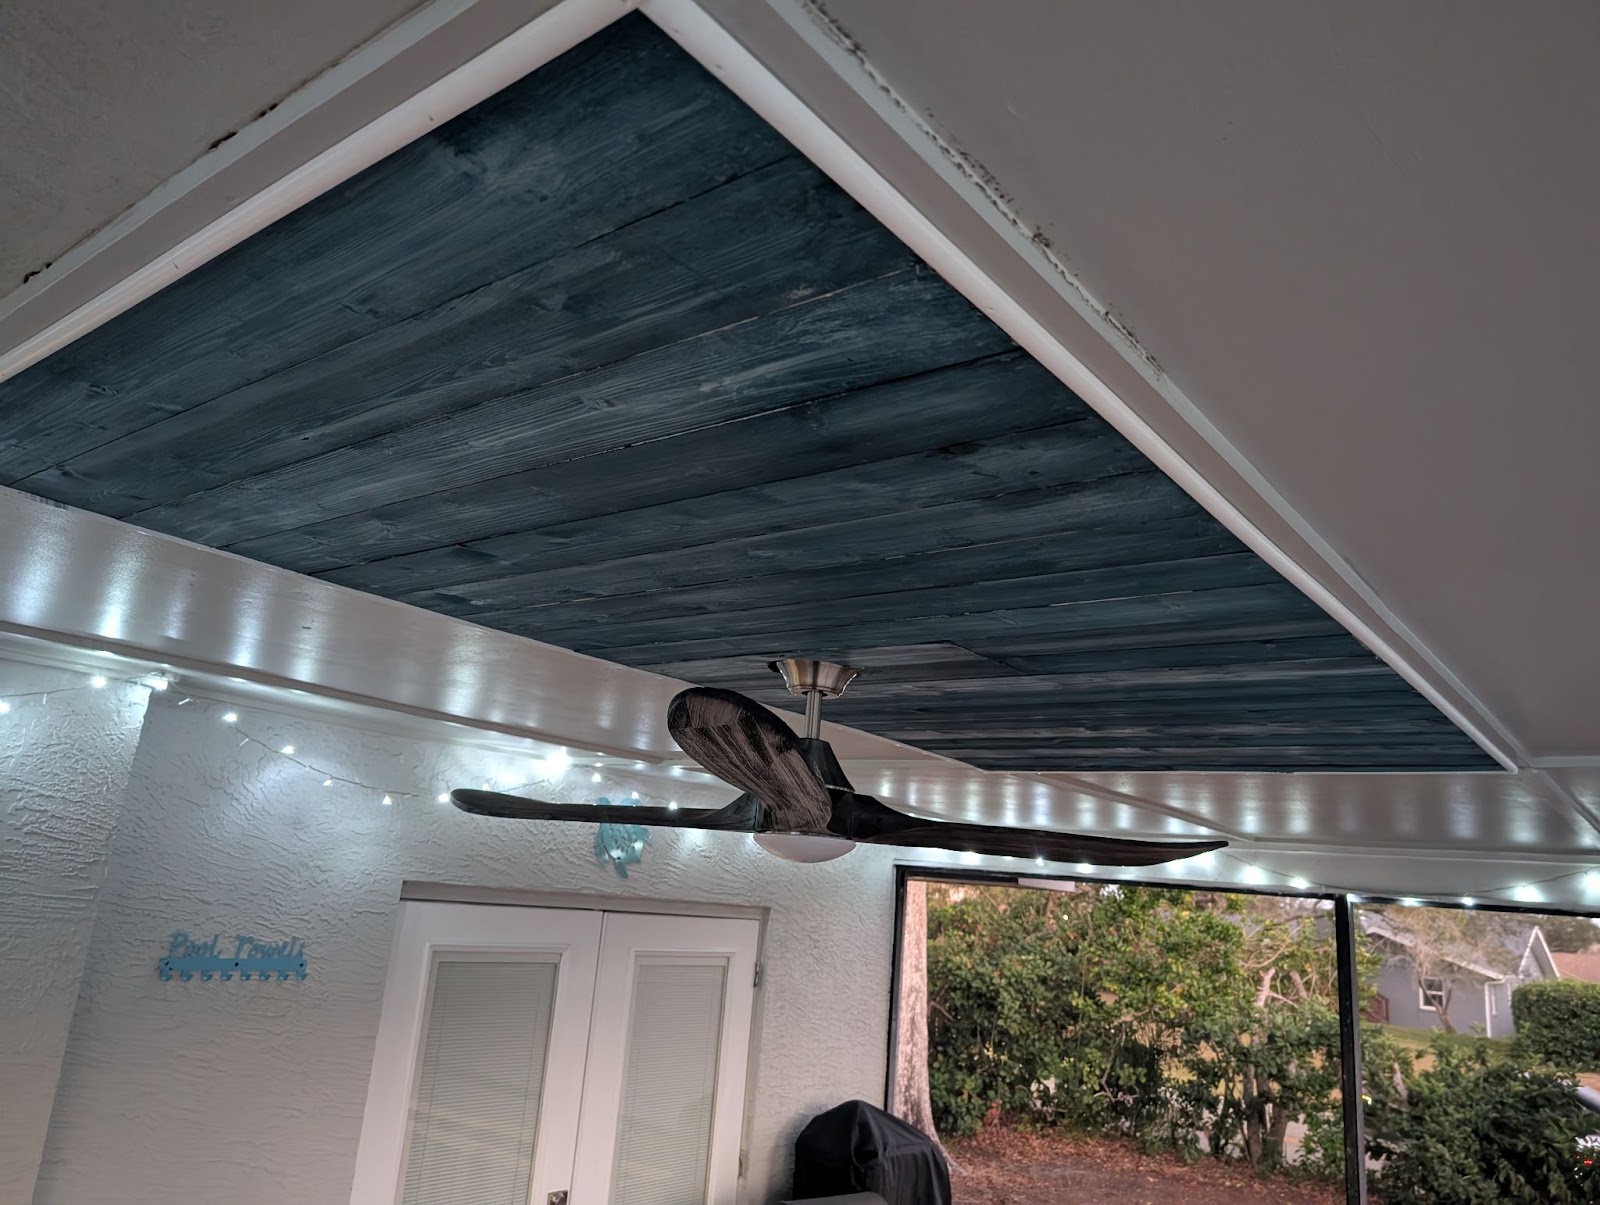
To make your outdoor kitchen island more comfortable year-round, it helps to install a roof or shade. A cover protects the space from rain, sun, and wind. It also gives you the option to add features like lighting or a ceiling fan.
Here’s what to consider:
- Choose a pergola, metal roof, or awning that fits your setup
- Make sure the structure is strong enough for wind and rain
- Add a ceiling fan to keep air moving on hot days
- Include lighting for evening use
- Make sure the roof doesn’t block airflow or trap smoke from the grill
A simple roof can make your outdoor kitchen island feel like a full room. It adds comfort, keeps the space dry, and makes cooking easier in any weather.
When to Call a Pro
Building an outdoor kitchen island is doable for many homeowners, but some parts of the job are better left to a professional. Things like electrical work, gas lines, and heavy framing can be tricky and need the right skills.
If you’re not sure how to handle wiring, setting up a grill with gas, or building a solid roof, it’s a good time to call in expert help. These parts of the project can affect safety and long-term performance.
Getting help from a pro can also save time and stress. A skilled team will know the right steps, avoid mistakes, and make sure your outdoor kitchen island is built strong, safe, and up to code.
Our Expertise in Outdoor Kitchen Island Projects
At One Clearwater Construction, we’ve helped homeowners across the area turn their available places, as well as backyards, into practical, beautiful outdoor spaces. Outdoor kitchen islands are one of our specialties. We focus on building smart, weather-resistant designs that work for Florida homes.
Every project starts with a clear plan. We help you choose the right layout, materials, and features based on your needs and space. From framing to finish work, we use quality tools and proven steps to deliver lasting results. Whether you want a full cooking setup or a compact grill station with storage, we’ll build it to match your vision.
If you’re ready to build an outdoor kitchen island that looks great and works hard, our team is here to help. We keep the process simple, clear, and on schedule from start to finish.
Let’s Build Your Outdoor Kitchen Island Together
Now you’ve seen what it takes to build a strong, useful outdoor kitchen island. From choosing the right spot to adding the final roof and fan, each step adds value to your space and helps you enjoy your backyard more.
You don’t have to figure it all out alone. At One Clearwater Construction, we bring the tools, skills, and planning to do the job right. We build outdoor kitchen islands that last, look great, and fit your needs, down to the last detail.
Want to create a space where you can cook, relax, and host outside?
Get a free quote today and let’s build your outdoor kitchen island together.